GAMESPOT.COM  |  PC GAMES  |  VIDEO GAMES  |  PC HARDWARE  |  GAMESPOT LIVE  |  GAMEBUYER
Click here!


GameSpot
 SEARCH FOR:
 ON:


 PC GAMES
  News
  Reviews
  Previews
  Movies/Media
  Downloads
  Hints/Codes
  GameGuides.com
  Special Features
  Beta Center
  Release Calendar
  Forums
  Top Games

 PC GENRES
  Action
  Adventure
  Driving
  Puzzle
  Role-Playing
  Simulation
  Sports
  Strategy

 SWITCH TO:
  VIDEO GAMES
  GAMESPOT LIVE
  GAMEBUYER
  HARDWARE

 SUBSCRIBE TO:
  PC Newsletter
  HW Newsletter

 ELITE SERVICES
  Join GameSpot

 SEE ALSO:
  3D Browser
  3DFiles.com
  GameFAQs
  Gamespy Arcade
  Netflix
  Tweakfiles.com

 INFORMATION
  Help
  Contact Us
  International


Baldur's Gate II: Shadows of Amn
Chapter 7

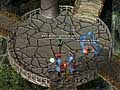
It's time for the final portion of Baldur's Gate II. Moving right along from the drow elf areas, the rest of the game will take place in regular elfland, beginning in Suldanesslar.

Suldanesslar

Elhan will ask you to find Ellesime or Demin to find out what's going on in the city. There are plenty of monsters around, including rakshasas, golems, and trolls, so be careful. First, head to the north and search the house there. You'll encounter two stone golems and a clay golem, so be careful. Take the cloak of elvenkind and the stone horn from the receptacles and head back to Elhan. Now, proceed west to the area marked "House of the Talisman" on your map. Above it are the priest's quarters. Head up to the priest's house and take the elven priest stone from the desk. Now, go to the house of the talisman and click on the puzzle above the fireplace-type device. You'll be faced with a puzzle, the answer to which is on the priest stone you just got. (The sequence is corellan, rillifane, water, and tree.) You'll receive the talisman of rillifane when the box opens. Don't miss the narrow ledge on the bookcase in the north end of this room; it'll contain a high-level scroll.

screenshot
Unfortunately, the elves won't be a big help here.
Now, leave the room and proceed west toward Demin's house. Destroy the skeleton warriors that are attacking the elves. Save your game before heading further to the west; you're about to face a nasty spellcasting drow. Raamilat has a pet nabassu that will attack you when you get close enough. If you send a scout character up there, you can lure the nabassu away and kill it. Once you get closer, Raamilat will cast time stop, with meteor swarm, protection from evil, and gate (to summon a pit fiend) during the pause. Your best bet might be to select a character with high fire resistance to act as a punching bag here, triggering the time stop, then running away before the meteor swarm really gets going. Despite his protection from evil, the pit fiend will probably attack Raamilat right away. You can jump off-screen to let them fight, though Raamilat will probably kill it fairly quickly with a disintegrate or horrible wilting spell. Be careful fighting Raamilat; he can maze your characters, which will take them out of the action for a bit.

screenshot
When you play with fire...
When Raamilat is dead, head into Demin's house. She's being attacked by three rakshasas. Kill them, with the focus being on the Adsaan, the spellcaster of the bunch. Speak to Demin for a while to learn exactly what Irenicus' original crime was, and you'll learn that you must find three artifacts to summon the avatar of the leaflord. You already have one; the talisman of Rillifane, but you need the other two: a golden cup and the moonblade.

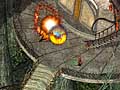
Walk southeast where you fought the skeleton warriors. From there, proceed northeast toward the House of the Moon. Enter it, and you'll witness an encounter between the city's chosen warrior and a balor, after which they'll both die. Pick up the moonblade from the warrior and head to the northwest. Stop by the harpist's house and get the stone harp, then go to the forest clearing. Save your game; you're going to be fighting a dragon pretty soon.

Nizidramanii'yt (say that three times fast) is a black dragon that guards the golden goblet of life in the forest clearing. You have two options: Give him all your possessions for the goblet or take it from him by force. You can drop all your items on the ground and get around him that way, though you'll still lose gold, and it will be quite a hassle dropping every single thing you have on all six characters.

screenshot
Imoen and Aerie bravely attempt to take out a dragon by themselves. What's not shown is their gruesome deaths.
Fighting him is also fairly difficult, though. He's tough, obviously, and he can cast an insect swarm that will do massive damage to your party over time. (It seems to be around two or three damage a second in real-time.) This will prevent them from casting any spells while the spell is in effect, so you'll want to cast any offensive spells before he manages to swarm you. Horrid wilting is an excellent choice if you have any scrolls or are of a high enough level to actually cast it. In any case, once he's cast the swarm, he'll probably revert to one-on-one melee attacks, with occasional breath or wing buffets thrown in to the mix. When he falls, take the goblet of life and rest in this relatively safe area.

Head to the Temple of Rillifane on the west side of your map. Be careful when approaching: There are Rakshasa guarding the entrance. Send a sacrificial monster or animal to suffer the cloudkill spell that the spellcasting rakshasa will throw down (which, by the way, will probably take out a couple of his teammates as well), then follow up with the rest of your characters.

 
« Previous Page Walk-through (cont.) »

 
ALSO CHECK OUT
Baldur's Gate II: Shadows of Amn
DOWNLOADABLE
GAME GUIDE

Create and develop your main character

Get spells and weaponry information

Find information on your friends and enemies

Discover a detailed walk-through of the game's main story

Requires Adobe Acrobat 3.0 or higher


get it now...

  CNET Networks: CNET | GameSpot | mySimon | TechRepublic | ZDNet About GameSpot  

  GameSpot is a CNET Networks Media Property. Copyright ©1995-2001 CNET Networks, Inc. All rights reserved. Privacy policy.