
PC GAMES
News
Reviews
Previews
Movies/Media
Downloads
Hints/Codes
GameGuides.com
Special Features
Beta Center
Release Calendar
Forums
Top Games
PC GENRES
Action
Adventure
Driving
Puzzle
Role-Playing
Simulation
Sports
Strategy
SWITCH TO:
VIDEO GAMES
GAMESPOT LIVE
GAMEBUYER
HARDWARE
SUBSCRIBE TO:
PC Newsletter
HW Newsletter
ELITE SERVICES
Join GameSpot
SEE ALSO:
3D Browser
3DFiles.com
GameFAQs
Gamespy Arcade
Netflix
Tweakfiles.com
INFORMATION
Help
Contact Us
International

|
 |
The entrance to the kuo-toa lair is marked as the western tunnels on your map near the myconid cavern area. Quicksave once you enter and head to the east. You'll find yourself in a large cavern. There's a chamber to the northwest with a beholder and two gauths if you wish to try your luck there, but be careful: They're quite tough. To the northeast, there is a kuo-toa party, consisting of a few warriors and a priest.
Head west from the main cavern and bypass the northern corridor for now. There is a fiery passage here; it's trapped with a flamestrike spell. Send a character with high hit points or magic resistance through to trigger it, then send the rest of the party through. This room is a trap; summon an animal on the altar to warp in five demon knights. You can kill them for some great items, though, including a girdle of frost giant strength (it permanently sets one character's strength to 21).
 | 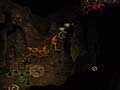
If you can clog the narrow hallway, you can to deal with the Kuo-Toa forces more easily. |
Now, head up the northern corridor. Defeat the kuo-toa and proceed northwest. This is going to be a tough battle, so be sure to save and heal your characters before you proceed. When you enter the small room to the northwest, you'll face off against a party of kuo-toa, including a captain and a wizard. Unfortunately, as the battle rages, other kuo-toa to the east and west will be alerted to your presence and rush in. You might want to try summoning creatures into the small room before heading in or sending a mage in to cast a lead off fireball or cloudkill spell in an attempt to lure the captain and his entourage out into the cavernous area. You'll be facing off against at least a dozen kuo-toans all told, with the wizards, captains, and the prince himself being the toughest of the bunch. The prince seems primarily a melee fighter, but he can take a ton of damage, and the monitors or priests can heal him. Once all the enemies are dead, search their bodies for treasure. The prince's body will have the blood you need as well as more than 4,500 gold.
| 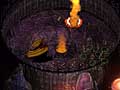
That's one angry demon. |
Now, head back to the drow city and talk to the matron mother. Phaere will want to speak to you in her quarters, so walk back to the Female Fighter's Society. Phaere wants you to exchange a set of fake dragon eggs for the real eggs that the matron mother has. As you walk to the Temple of Lolth, Solaufein will appear before the door and give you yet more fake eggs to give to Phaere. Accept his offer and head inside. Now, give Phaere's fake eggs to a thief that can cast hide in shadows or (preferably) a priest capable of casting sanctuary. You must make the exchange without the guards finding out about it, or you'll be dead. The egg chamber is to the west. Send your solo eggschanger (groan) over there and have him become invisible. Once the door to the chamber is opened, the egg guards will go hostile, so make sure the rest of your party is nowhere nearby. Once you make the exchange, the golems inside the chamber will become hostile as well, so be careful. Once you make the exchange, leave the chamber and head back to Phaere. Give her Solaufein's fake eggs.
Proceed to the mother matron's lair in the Temple of Lolth. She'll begin a ritual to summon a powerful demon to help the drow in their battle with the surface elves. Once the ritual begins, the demon lord will appear and smite the matron mother for tempting him with false eggs. Phaere will bite the dust, as well, leaving you all alone with their corpses. Check the bodies for some interesting items, including gorgon plate +4 and a ring of spell turning. Get ready to fight: The city has finally turned hostile to you, and you must get the hell out of Dodge as quickly as possible.
| 
Here are some of the last drow you'll be seeing in the game... enjoy. |
The flight to the city gates probably isn't as bad as it could be. You might want to summon an aerial servant or other monster to act as your vanguard. You'll encounter a few drow, a wizard, and a bunch of commoners near the entrance. Once you head out to the cave area, go to Adalon's lair. She'll transform herself into a human and transport the party to a spot in the kuo-toa lair that leads to the surface. There are drow guarding it if you didn't kill them earlier, but she'll help out in their destruction. Once she teleports back, you'll get almost 80,000 experience for each party member.
Head through the door, but save your game first. You'll be ambushed by a party of drow, including spiders and a wizard. The wizard may summon an earth elemental, so watch out. Proceed to the north, where the drow apparently tunneled through to the elven quarters. You will encounter more drow, but there will be plenty of war elves to help take them out.
Once you reach the surface, Chapter 6 begins.
|
|
|