|
| GAMESPOT.COM | PC GAMES | VIDEO GAMES | PC HARDWARE | GAMESPOT LIVE | GAMEBUYER |
| ||
PC GAMES News Reviews Previews Movies/Media Downloads Hints/Codes GameGuides.com Special Features Beta Center Release Calendar Forums Top Games
PC GENRES |

Returning the Horadric scroll to Deckard Cain activates the second entry in the second quest's log. The entry includes all the goals to complete the Horadric staff, which will be used to enter Tal Rasha's tomb. The cube should be your first destination, as its location is the closest and least dangerous of the dungeons; you'll find the cube in the halls of the dead dungeon located in the second area of the dry hills. Descend into the halls of the dead and locate the marked chest on level three; open the chest and acquire the Horadric cube inside.
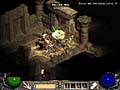
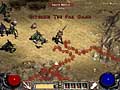
Returning the Horadric cube to Deckard Cain reveals its purpose and other uses. Cain will tell you how to use the cube to restore the staff, but he also indicates its other purpose - the cube can be used to transmute other items as well. At its basic level, the cube can be used as additional inventory storage. Keep the cube in your main inventory and open it up with a right-click. If your main inventory is crowded, slide items into the open cube for additional storage space. Cain reveals that the cube can be used to improve gem quality. By placing gems of inferior quality into the cube and hitting the transmute button, you can create a single gem of higher quality. You can also combine gems with weapons and even change arrows into bolts. Keep in mind that the results of transmutation isn't always positive, so don't experiment haphazardly unless you're willing to potentially lose important items. Your next goal is the shaft, which lies in the maggot's lair found in the far oasis area of the desert surrounding Lut Gholein. Descend to the third level of the maggot lair's and find the marked chest in the dead-end room protected by a horde of sand maggots. These sand maggots offer a unique challenge. You must eliminate the sand maggots quickly; the sand maggots lay eggs that sprout sand maggot young. It's easy to get overwhelmed with monsters if you neglect the sand maggots. Also, look for the sand maggot eggs and destroy them before they sprout the sand maggot young. The sand maggots also feature a poisonous attack; wear armor with resistances to poison to help counter the effects. UNIQUE MONSTER: A unique sand maggot, Coldworm the Burrower, protects the shaft; Coldworm is cold enchanted and magic resistant making it a tough customer against all elemental attacks; melee attacks should prove much more effective. Clear out Coldworm's lair (littered with sand maggots, sand maggot young, and eggs) before moving against the unique beast.
Act II Bestiary: The gigantic Blunderbore are impressive beasts - and quite durable! Each Blunderbore type - which include the blunderbore, gorbelly, and mauler - feature stun and knockback attacks. Attempting to duke it out with these mammoth creatures could prove deadly. Carry plenty of healing potions and prepare to take defensive (and evasive) measures at a moment's notice.
|
|
||||||||||||||||||||||||||||
| ||||||