 |
|
 |
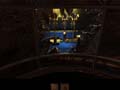
The Elevator You can attempt to ride the elevator up to the upper floor of the dome, but you will soon discover that it's not entirely operational. The elevator should rotate as it moves up; that way when you reach the top, you're facing the correct direction and can walk off into the top floor of the dome instead of into the wall! If you do attempt to ride the elevator and discover it's not working correctly, ride it back down to the lower floor of the observatory. To fix the elevator, you must first find the control mechanisms. A thorough search of the room reveals nothing; however, there's one area of the room that you can't search unless the elevator is sent to the upper floor of the dome! Activate the elevator and send it to the upper floor. The empty elevator shaft ahead of you contains the control mechanisms. Walk down into the elevator shaft. Once inside you can rotate around the shaft and notice four different control mechanisms. For the elevator to work properly, you must align each control mechanism correctly. You won't be able to complete the puzzle through trial and error--unless you are extremely lucky--so you need some sort of guide or clue to get you started.
1. The Weights: Rotate around the elevator shaft until you spot the three weights, each dangling on its own chain. You must adjust the weights until they match the sketch inside Saavedro's journal. The sketch places the left weight at the lowest position and the center and right weights at the middle position. So, face the weights and adjust the left weight twice; leave the center weight alone; and finally adjust the right weight twice so it rests on the middle position. 2. The Gears: Rotate around the elevator shaft until you spot the two gears--the gears rest vertically. Inside Saavedro's journal, you'll notice a similar diagram, which reveals the correct positioning of the two gears. You must adjust the gears until the gap on the top gear rests inside the teeth of the bottom gear. Rotate the upper gear until the gears match the sketch inside Saavedro's journal--the gap on the upper gear must align with the teeth of the bottom gear. 3. The Wheel: Rotate around the elevator shaft until you spot the wheel resting horizontally on its side. The wheel can be rotated into three positions--at the end of each position is a bolt that must be configured properly. You must adjust two of the bolts so that the threaded side points toward the left; leave the third bolt in its original position with the threaded side pointing toward the right. Turn the wheel so the unchanged bolt can be seen through the hole in the wall. 4. The Switch: Rotate around the elevator shaft until you spot the final mechanism, a simple switch with two positions. The switch begins in the incorrect position; adjust the switch to the other position (to match the sketch in Saavedro's journal) to complete the mechanism.
Once all four elevator mechanisms are aligned correctly, the elevator will operate properly, and you will be able to ride to the upper floor of the dome and exit successfully. Maneuver out of the elevator shaft and call the elevator down to the lower floor. Move inside the elevator and ride to the upper floor. Open the door and exit the elevator.
|

| News |
All Games |
PC |
Xbox |
PS2 |
GC |
GBA |
DC |
N64 |
PS |
Saturn |
GBC |
Hardware |
Forums |
GSLive | |
|
Help |
Worldwide |
About Us |
Advertise on GameSpot |
Join GameSpot Complete |
Shop for Games | |
| CNET Networks: Builder | CNET | GameSpot | mySimon | TechRepublic | ZDNet | About CNET Networks |