|
PC GAMES
News
Reviews
Previews
Movies/Media
Downloads
Hints/Codes
GameGuides.com
Special Features
Beta Center
Release Calendar
Forums
Top Games
PC GENRES
Action
Adventure
Driving
Puzzle
Role-Playing
Simulation
Sports
Strategy
SWITCH TO:
VIDEO GAMES
GAMESPOT LIVE
GAMEBUYER
HARDWARE
SUBSCRIBE TO:
PC Newsletter
HW Newsletter
ELITE SERVICES
Join GameSpot
SEE ALSO
GameFAQs
Gamespy Arcade
Netflix
INFORMATION
Help
Contact Us
International

|
|

Continue north then east, and watch out for the wall rocket launchers. There's also an enemy Ghost on high ground that can make trouble, but you can head up the stairs to the east and finish him off. Continue south past a door and you'll face Firebats and wall rockets, none of which should be too much trouble. Move up the stairs and continue south past a door, taking care to eliminate the three pop-up turrets that lie behind it. Advance south then east past a door, take out the enemy Marines, and follow the path to find Stukov. After Duran vanishes, you'll be reinforced with more Marines, and you'll have 15 minutes to reach the self-destruct manual-override terminal. Best get moving quickly to the north.
When you reach the stairs down, a horde of Zerglings will rush toward your position. Using Stim Packs, your Marines should be able to kill them before they get too close. Go on down the stairs and be ready for more Zerglings, then press your way west past a door, then north up a flight of stairs. You'll come to an intersection; if you head west, you'll fight more Zerglings but behind them you'll find two Marines and two Firebats who will join your cause; if your numbers are strong, don't waste your time - work your way east, then north.
Trigger the beacon to see what lies in store, then continue north and beware of a Zergling ambush - they'll attack from behind as well. Run west, then north; ignore the trapped Ultralisks because you don't have time to waste killing them. Besides, two will break down the door just up ahead, but you should be able to take them if you concentrate your fire. Move past another door and listen to your Marine's plan to lure the Zerg into the pop-up turret defenses. Trigger the northern door, unleashing the Zergling swarm, and run back, letting the turrets do all the work. When the coast is clear, proceed north past a door. As you continue east, several Hydralisks will attack, but shouldn't be too tough.
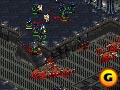
Although your Marines are ill-equipped to deal with Hydralisks, their high-ground advantage and support from your Medics allows them to defeat their powerful enemies. |
You'll hear Infested Terrans as you press on. Stand your ground and use your Stim Packs, and both will die before causing you any trouble. The path will veer east, and after you deal with a few Zerglings, you'll encounter a platoon of Marines holding off the Zerg from high ground. Help them out and any survivors will join you. Move down the stairs and east past a door. Plenty more Zerglings await as you head south, and past the next door you'll even face a Defiler's Plague. Your Medic can restore the afflicted units, but don't hesitate too long; head south along the path. Many more Zerglings stand in your way, but eventually you'll reach the manual override terminal, and by activating it, you'll complete the mission.
Next: Mission 8: To Chain the Beast
GameSpot is a CNET Networks Media Property. Copyright ©1995-2001 CNET Networks, Inc. All rights reserved. Privacy policy.
|
| |
|

