|


 News News

Reviews
Previews
Movies/Media
Downloads
Hints/Codes
Game Guides
Special Features
Beta Center
Release Calendar
Forums
Top Games

Action
Adventure
Driving
Puzzle
Role-Playing
Simulation
Sports
Strategy

PC Newsletter
HW Newsletter

Join GameSpot

3D Browser
CD Center
GameFAQs
Netflix
|
|
|

|
|
|
|
|
|
|
The Graveyard Lich/Marlowe in trouble , Marlowe is in the tavern |
Retrieve the soul of Marlowe's daughter |
After speaking to Marlowe in the tavern, follow him to his house (you must travel through a residence) to reach his house on the hill. He'll grant you the ability to get into the graveyard, where you'll confront the lich. You won't get the soul back unless you go back to get Marlowe. Once you get the soul back, you can either defend Marlowe or let the lich have his reward. |
6,000 experience points per party member when you bring Marlowe to the graveyard and another 10,000 experience points per party member for saving his daughter's soul (or 15,000 experience points per party member if you also save Marlowe) |
|
Assault on the Enclaves, Balthazar when you arrive |
Dispatch two powerful Bhaalspawn, Sendai and Abizagal |
Each of the Bhaalspawn is in a separate fortress. Follow the detailed instructions under sector 14 and 15 on how to best confront them. |
10,000 experience points per party member to enter each lair; 40,000 experience points per party member for killing each one |
|
The priest near the temple |
Save the priest near the temple from the monk |
As soon as you see the confrontation develop, swarm in around the monk so that he can't get to the priest without going through your party. As soon as the attack commences, force an attack against the monk. When you talk to the priest afterward, donate 1,000 gold. |
3,000 experience points per party member and one reputation point if you donate the gold (2,000 experience points per party member if you don't make the donation) and the oaken ring |
|
Mercenaries confronting a girl and her father near the tavern |
Save the girl from execution |
It's easy to antagonize the mercenaries into attacking you instead just by being confrontational. |
Montolio's cloak, 500 gold, 5,000 experience points per party member, plus one reputation point |
Immediately upon arriving at this sector, you'll be greeted by Balthazar and his men. There are mercenaries swarming throughout the town, and it doesn't take much provocation to start a battle with them. Just south of your conversation with Balthazar, Captain Erelon is summoning creatures for his archer crew to practice against. If you criticize his actions, the captain will immediately order his men to attack you. They aren't strong opponents, but they are equipped with decent magic equipment and can mete out some damage (all mercenaries wear chain mail +3 and are armed either with longbows +1 or long swords +1).
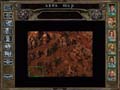
Preparing for battle. Balthazar's lair is in the northwest corner of town, while the smugglers are in a cave to the east. You'll have to travel to a couple of houses on the cliffs on the eastern side of town. To get to the cliffs, you'll have to crawl through a residence. |
A monk and a priest start battling if you wander near the temple. It's clear that the monk is the bad guy in the confrontation, and you can step in to save the priest, but doing so will earn you a warning from a mage that teleports in (tell the mage that the monk was attacking the priest). If you save the priest and donate 1,000 gold, you'll get 3,000 experience points per party member and one reputation point plus an oaken ring (which you can also get off the priest's body if you let the monk kill him). If you save him, but don't donate the money, you'll just get 2,000 experience points per party member and no reputation point gain.
Saemon Havarian will bait you into defending him from two mercenaries (2,000 and 3,000 experience points). There's no way to avoid the fight, so just ensure your fighters are at the front of the ranks. You'll also stumble upon a couple of mercenaries about to execute Asana Haraad for thievery. If you intervene on her behalf and defend her, her father will give you Montolio's cloak, 500 gold, and 5,000 experience points per party member, and your reputation will increase one point. If you don't intervene, you'll lose one reputation point.
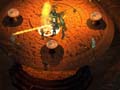
Turn those traps away. When you use the tables, you'll disarm some of the traps on the platform, but you'll also initiate some tough battles. You don't need to turn the tables in order to get what you need from this room. You can't open the central door until you've confronted both Sendai and Abazigal. |
Marlowe will approach you when you enter the tavern and ask you to meet him at his house at the top of the hill on the east side of town (you must go through a residence and climb on the roof). He'll send you to kill a lich in the graveyard (which is inaccessible until you get this quest) to save the soul of his daughter. But when you arrive at the graveyard, the lich will inform you that Marlowe broke his prior deal for his soul. You can attack the lich immediately, but you'll lose the soul of Marlowe's daughter. Or, you can elect to (temporarily) avoid violence by bringing Marlowe to the lich (he'll come willingly when you confront him at his house), getting 6,000 experience points per party member and another 10,000 experience points per party member if you then restore the soul of his daughter. You can elect to kill the lich after you get the soul. If you save Marlowe, you'll earn 15,000 experience points per party member, plus one reputation point (or 6,000 experience points per party member and lose two reputation points if you keep the soulstone, which is a magic item you can wear instead of a helmet). Fortunately, the lich won't cast imprisonment, but will use simulacrum to double its attacks as well constantly use sequencers to cast stoneskin, improved mantle, shadow door, and protection from magic weapons. So, make sure you can breach his defenses and use truth seeing to dispel his illusions. A banshee will attack from each side, so ensure that you have protections like bless and chant to increase your saving throw rolls when they use their deadly wails. The lich will summon pairs of skeletons constantly, and there's a row of archers elevated on a platform behind the lich. Try to move a cleric within range of the skeletons to instantly destroy them by using the cleric's turn undead ability because otherwise your fighters will find themselves surrounded and unable to close in on the lich.
In the lich's lair, if you turn the tables you'll unleash, successively, clockwise starting with the northern table: greater air elements, fission slime, ice golems, and greater fire elementals. Turing the tables will disarm most, but not all, of the traps on the doors on the elevated platform. You can't enter the locked door in the center of the platform until after you've defeated both Sendai and Abazigal.
In you enter the smuggler's cave, you'll witness Carras about to be arrested by some mercenaries who are looking for Esamon (Saemon Havarian). If you intervene to help him, you'll get 10,000 experience points for killing each monk and a discount on goods. Two of the chests at the back of the room are trapped.
|
|